python打包文件之pyinstaller
桌面应用想要使用就要先进行打包,python扩展包pyinstaller帮我们提供了打包功能,使用过程中你会发现很多坑,后面解释。
pyinstaller常用参数
说明
以下介绍假设用户脚本为main.py,生成结果为main.exe。
有些参数实在很少用到,只列出简单介绍,具体请参阅原文。
1 | 以下介绍假设用户脚本为main.py,生成结果为main.exe。 |
通用参数
| 参数名 | 描述 | 说明 |
|---|---|---|
-h |
显示帮助 | 无 |
-v |
显示版本号 | 无 |
–distpath |
生成文件放在哪里 | 默认:当前目录的dist文件夹内 |
–workpath |
生成过程中的中间文件放在哪里 | 默认:当前目录的build文件夹内 |
-y |
如果dist文件夹内已经存在生成文件,则不询问用户,直接覆盖 |
默认:询问是否覆盖 |
–upx-dir UPX_DIR |
指定upx工具的目录 |
默认:execution path |
-a |
不包含unicode支持 |
默认:尽可能支持unicode |
–clean |
在本次编译开始时,清空上一次编译生成的各种文件 | 默认:不清除 |
–log-level LEVEL |
控制编译时pyi打印的信息 |
一共有6个等级,由低到高分别为TRACE DEBUG INFO(默认) WARN ERROR CRITICAL。也就是默认清空下,不打印TRACE和DEBUG信息 |
与生成结果有关的参数
| 参数名 | 描述 | 说明 |
|---|---|---|
-D |
生成one-folder的程序(默认) |
生成结果是一个目录,各种第三方依赖、资源和exe同时存储在该目录 |
-F |
生成one-file的程序 |
生成结果是一个exe文件,所有的第三方依赖、资源和代码均被打包进该exe内 |
–specpath |
指定.spec文件的存储路径 |
默认:当前目录 |
-n |
生成的.exe文件和.spec的文件名 |
默认:用户脚本的名称,即main.py和main.spec |
指定打包哪些资源、代码
| 参数名 | 描述 | 说明 |
|---|---|---|
–add-data |
打包额外资源 | 用法:pyinstaller main.py --add-data=src;dest。windows以;分割,linux以:分割 |
–add-binary |
打包额外的代码 | 用法:同–add-data。与–add-data不同的是,用binary添加的文件,pyi会分析它引用的文件并把它们一同添加进来 |
-p |
指定额外的import路径,类似于使用PYTHONPATH |
参见PYTHONPATH |
–hidden-import |
打包额外py库 |
pyi在分析过程中,有些import没有正确分析出来,运行时会报import error,这时可以使用该参数 |
–additional-hooks-dir |
指定用户的hook目录 |
hook用法参见其他,系统hook在PyInstaller\hooks目录下 |
–runtime-hook |
指定用户runtime-hook |
如果设置了此参数,则runtime-hook会在运行main.py之前被运行 |
–exclude-module |
需要排除的module |
pyi会分析出很多相互关联的库,但是某些库对用户来说是没用的,可以用这个参数排除这些库,有助于减少生成文件的大小 |
–key |
pyi会存储字节码,指定加密字节码的key |
16位的字符串 |
生成参数
| 参数名 | 描述 | 说明 |
|---|---|---|
-d |
执行生成的main.exe时,会输出pyi的一些log,有助于查错 |
默认:不输出pyi的log |
-s |
优化符号表 | 原文明确表示不建议在windows上使用 |
–noupx |
强制不使用upx |
默认:尽可能使用。 |
其他
| 参数名 | 描述 | 说明 |
|---|---|---|
–runtime-tmpdir |
指定运行时的临时目录 | 默认:使用系统临时目录 |
Windows和Mac特有的参数
| 参数名 | 描述 | 说明 |
|---|---|---|
-c |
显示命令行窗口 | 与-w相反,默认含有此参数 |
-w |
不显示命令行窗口 | 编写GUI程序时使用此参数有用。 |
-i |
为main.exe指定图标 |
pyinstaller -i beauty.ico main.py |
Windows特有的参数
| 参数名 | 描述 | 说明 |
|---|---|---|
–version-file |
添加版本信息文件 | pyinstaller --version-file ver.txt |
-m, --manifest |
添加manifest文件 | pyinstaller -m main.manifest |
-r RESOURCE |
请参考原文 | |
–uac-admin |
请参考原文 | |
–uac-uiaccess |
请参考原文 |
常见问题
Failed to execute script main
这个问题解决这个问题的方法很多,主要看你对应的报错信息,本人报错提示为:ImportError: unable to find Qt5Core.dll on PATH。
https://stackoverflow.com/questions/56949297/how-to-fix-importerror-unable-to-find-qt5core-dll-on-path-after-pyinstaller-b
https://github.com/pyinstaller/pyinstaller/issues/4293
里面描述的比较详细,具体就不详说了。总的来说呢,就是有的版本pyqt5库对系统变量的加载存在bug,具体原因只有官方才能解释了,咱也没法管了,对有bug的版本库提供一种办法就是,在主程序中pyqt5库import之前就对系统变量进行手动设置,import代码如下:
1 | import sys, os |
这样就解决了该问题。
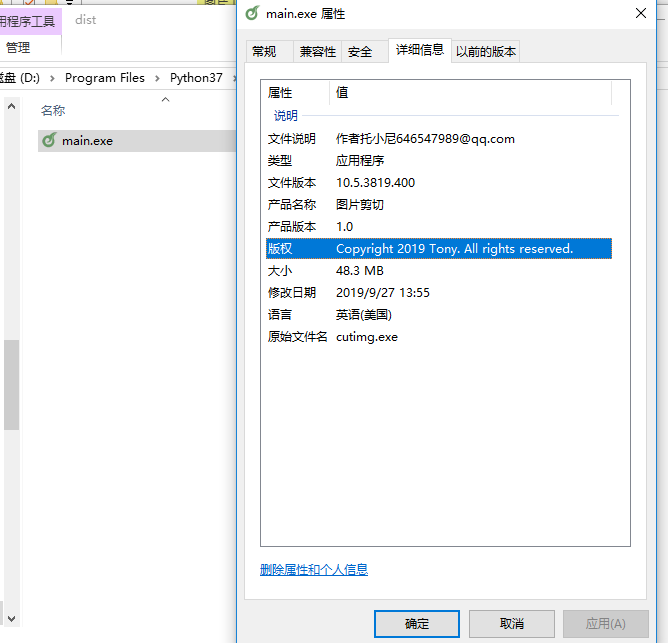
加入打包文件信息
1 | pyinstaller -w -D --icon=icon.ico --version-file=file_version_info.txt main.py |
file_version_info.txt保存的是文件信息
其格式大概如下:
1 | # UTF-8 |
使用时可以复制以上代码,也可以参考别的exe文件生成一份
若之後版本更新不能使用的話
- 打開
CMD,CD到Python安裝目錄下cd Lib/site-packages/PyInstaller-3.3.1-py3.6.egg/PyInstaller/utils/cliutils/ - 輸入
python grab_version.py {拖曳任一安裝或免安裝的exe檔到CMD} - 按下
ENTER,會自動產生file_version_info.txt,再將內容修改成自己要的資訊就可以使用了!